Tutorials · 16 short films of the real app

TimeTally Tutorials For Managers And Staff

Explore TimeTallySee everything in these films side by side, then try it with your own team. 14 days free, no card, then £3 per employee a month.14 days free · no card · £3 per employee

How-to videos for every part of TimeTally, filmed in the app itself. Short ones for your staff on clocking in, timesheets, booking time off and the rota. Longer ones for managers on setting up leave, rotas, overtime, TOIL, GPS and payroll. The same films are in the app under Settings, then Tutorials.

  • Captions and a transcript on every video
  • Free to watch, no sign-up
A two-minute tour of TimeTallyThe dashboard, booking and approving leave, clocking in, approving hours with overtime, exporting to payroll, and building and publishing a rota.
Read the transcript: A two-minute tour of TimeTally

Welcome to TimeTally. Here's a quick tour of how it works. This is your dashboard, with your whole team's month on one screen: who's on shift, who's off, and the hours they've sent in. Leave and timesheets waiting for you are right underneath.

First, leave. Your team books holiday on their phone. They tap the days, choose the type of leave, and send it. Their allowance updates straight away.

You approve it in one click, with everyone's time off on the calendar below. Next, their hours. They clock in on their phone, on the job they're doing, and GPS can check they're on site. At the end of the week, you check their hours and approve them, with overtime already worked out from your rules, paid at a higher rate, or banked as time off in lieu.

Then export it all to Xero, QuickBooks, or a spreadsheet. Then the rota, which only takes minutes to build. Click someone's day to add a shift, with its times and role. Shifts you use a lot can be saved as day templates and dragged straight on.

You can save a whole week as a template too, and repeat it. Or pick a day's shifts, copy them, and click to paste them across the week. Publish it when it's ready, and email just the people whose shifts have changed. Everyone sees their own shifts on their phone, and who they're working with.

Everything can be set up to fit how you work, and each part has its own short video when you get to it.

Find the video you need

For managers

Set up TimeTally, one video at a time

Watch them in order the first time: invite your team, then set up the parts you use. Each one is filmed in a real account, so what you see is where to click.

  1. How to invite your team

    1:53 · for managers

    Add someone with an email invite, or share one join link with everyone and approve each person who asks to join.

    Read the transcript: How to invite your team

    There are two ways to add your team. You can send each person an email invite, or share one join link with everyone. First, the email invite. On the Home screen, tap the green Add Employee button, next to the dates.

    Type their name and email address. Leave Send email invitation switched on, and tap Add employee. TimeTally emails them a link to set up their account. This is the email Jordan gets.

    To accept, Jordan taps Set Up Your Account. Next, Jordan picks a password, types it again, and taps Set Password. Jordan is now signed in. Back on your phone, tap the envelope to open Invite Status.

    It shows who has set up an account, and Jordan's says Accepted. The second way is a join link. It's quicker when you have lots of people to add. Your join link is at the bottom of Invite Status.

    Tap Copy invite link, and send it to your team in a group chat or a text. Chloe opens the link, types a name, email and password, and taps Join team. Until you approve the request, Chloe can't get in. Open the app again later, and Chloe is at the top of your team, marked Requesting to join.

    Tap the green tick, then tap Approve. Once you have, Chloe taps Check again, and the app opens. That's it. Use Add Employee to email an invite, or share your join link and approve each request.

  2. How to set up leave

    5:24 · for managers

    Add leave types, book sick leave in hours, set everyone's balance, pro-rata a starter and a part-timer, choose how leave builds up and book bank holidays.

    Read the transcript: How to set up leave

    This is how to set up leave for your team. You'll add leave types, set everyone's balance, use pro-rata for part years, and book bank holidays. Click Time Off at the top. On the left, Leave Types lists every kind of leave your team can book.

    To add one, click Add and type the name. This one is Study leave. Then pick a colour for it. Balance decides where the days come from.

    Open it to see the three choices. Comes out of annual leave takes the days from someone's holiday. No limit never touches an allowance, which suits sick leave. Its own allowance gives this type a separate pot of days.

    Study leave gets its own allowance. Give it five days a year, and click Add leave type. It now shows in the list. Leave can be booked in days or in hours.

    Sick leave often means going home part way through a shift, so hours suit it better. Click Sick Leave, and under Booked in, choose Hours. This applies to everyone. Click Save changes, and Sick Leave now says Hours in the list.

    Next, set each person's balance. Click Team, then open the Annual leave menu at the top. This menu picks what you're setting up. Annual leave is everyone's holiday.

    Other leave covers types with their own allowance. Future balances shows what someone will have on a later date. Start dates and Bank holidays are here too. Choose Annual leave.

    Each person has two boxes. Days left now is what they can still book this year. Days per year is their full allowance. Tom gets twenty-eight days a year.

    He hasn't taken any yet, so type twenty-eight in days left as well. Priya has eighteen and a half days left on your old spreadsheet. Type that in, then click Save. Study leave allowances are under Other leave.

    Tom is on a course this year, so give him ten days, then click Save. Go back to Annual leave, and click the three dots at the end of Sam's row. Unit shows his leave in days or hours. Accrual is how his leave builds up.

    Pro-rata gives a smaller allowance to someone who doesn't work the full year. Sam started on the first of July, so click Pro-rata. Start date and Leaving date cut the year down to the time someone is with you. Part-time scales the allowance to the days they work each week.

    Part-year is for term-time staff. Type Sam's start date, then switch on the option below it, so his allowance counts from that date. He gets twelve and a half days this year. Click Save.

    Aisha works three days a week. Click the dots on her row, then Pro-rata, and switch on Part-time. Her twenty-five days become fifteen. Click Save.

    Some leave is only for certain people. Priya isn't on a course, so click her name, then Leave on the left. Click the dots next to Study leave, and switch off Show to this employee. Priya won't see it when she books time off.

    Back on Team, click the dots on Tom's row. Accrual has four choices. Upfront gives the whole year on day one. Monthly adds a twelfth each month, and Daily adds a little every day.

    Per hour worked builds it from the hours they work. Choose Monthly. Two balances appear. Recalculate works out what Tom would have built up month by month so far this year.

    Keep leaves him on twenty-eight. Leave Recalculate picked, and click Save. To change it for everyone, go to Time Off and click Leave rules. Open How leave builds up, and pick the method your whole team uses.

    Last, bank holidays. On Team, choose Bank holidays from the menu. Each person needs a calendar, so the app knows which days to book. Under Set everyone to, choose England.

    Next to it, choose how bank holidays are paid. Paid, on top of allowance gives them as extra days off. Paid, from allowance takes each one out of their holiday. Unpaid suits zero-hours staff.

    Keep Paid, on top of allowance. Aisha is based at your Edinburgh site, so change her calendar to Scotland. Then click Save. Now choose how much of this year to book.

    The rest of this leave year books only the bank holidays still to come. The whole leave year also books the ones that have passed, so your records for this year show them too. Choose the rest of this leave year, and click Book bank holidays. That's it.

    Add your leave types on the Time Off page, set each person's balance on the Team page, and use pro-rata for starters and part-time staff.

  3. How to build a rota

    5:15 · for managers

    Schedules and roles, split and overnight shifts, day and week templates, copy and paste across the week, a staffing alert, and publishing one week at a time.

    Read the transcript: How to build a rota

    This is how to build a rota for your team. You'll set up schedules and roles, add shifts, and then fill whole weeks with copy and paste and templates. Last, you'll set up alerts. This is the Rota page, showing next week.

    A schedule is a site, a team or a shift pattern. Each one has its own rota and its own people. This one is Riverside Café. To add another, open the schedule menu and click Add schedule.

    Type the name, Market Hall Kitchen, and click Add schedule. The new schedule starts empty. You'd add the people who work there with Add employees. Open the menu again to go back to Riverside Café.

    Roles are the jobs people do on a shift, like chef or server. A role gives the shift a colour on the rota, and sets its unpaid break. Click Rota rules, then Roles. Click Add role, and type Barista.

    Give it a thirty minute break, pick a colour, and click Add role. Add a shift by clicking an empty day in someone's row. Priya opens the café on Monday, so type eight till four, and choose Barista. The break comes from the role.

    Click Save Shift. A split shift has a gap in the middle. Tom works eleven till three, then comes back for the evening. Click his Monday and type eleven till three.

    Then click Add another, and the second part is six till ten. Choose Server, and save. A shift can also run past midnight. Aisha is on from six in the evening until two in the morning, so the end time is earlier than the start.

    Choose Server, and click Save Shift. Shifts you use a lot can be saved as day templates. Early, Late and Evening are here, under the rota. Drag one onto a day to add that shift.

    Sam is on Early on Monday. You can make your own as well. Click New day template. This one is Lunch and dinner, from eleven till three, and six till ten.

    Click Add Template. Monday is done. To copy it to the rest of the week, click Select, and click each of Monday's shifts. Click Copy.

    Then click Tuesday on the top row, and the shifts go into the same rows. Do the same for Wednesday, Thursday and Friday, then click Done. Save the finished week, so you can use it again. Open Week templates and click Save this week.

    Call it Standard week, and click Save template. Click the template to use it. Into is the first week it goes in. Move it on to the ninth of November.

    Under Repeat for, you can choose a number of weeks, or one week in every month. Choose the second week of every month, then for twelve months. Pick the template, and click Preview where it lands to check it. Then click Apply.

    That added two hundred and seventy-six shifts. In Month view, the second week of November is filled in. The same goes for the second week of every month until next October. Next, alerts.

    An alert flags the rota when hours or staff go over or under what you expect. Click Rota rules, then Alerts, and click Add an alert. You want at least two people on every day. So choose Falls under, then Staff on shift, type two, and choose per Day.

    Click Add alert. Sunday has only one person on, so a red line shows above the rota. You'll see the alert again when you publish. Your team can only see a week once it's published.

    Publishing goes a week at a time, so Publish Shifts publishes the week you're looking at. Click it. The template put shifts in later weeks too, so it asks which weeks to publish. Untick the later ones, so only this week goes out.

    Then click Publish one week. The alert shows again, because Sunday is still short. You can go back and fix it, or click Publish anyway. Then it asks whether to email your team about their new shifts.

    Yes, notify employees sends the email. This time, click No thanks. The button now says Published, and the later weeks stay hidden from your team until you publish them. That's it.

    Set up schedules and roles once, add shifts by clicking a day, and use copy and paste and templates to fill whole weeks and months.

  4. How to set up projects

    4:00 · for managers

    Turn on projects and activities, add a project with its address and parent, pay extra for a project or an activity, and give a project its own clock-in place.

    Read the transcript: How to set up projects

    This is how to set up projects and activities for your team. A project is what the time was for, like a site, a client or a job. An activity is what the work was, like serving or cleaning down. Open Time Tracking, and click Time rules.

    Near the bottom, open Projects. Use projects turns them on for everyone. If you switch on Require a project to clock in, nobody can start the clock until they pick one. Employees can add projects lets your team make their own.

    Leave it off if you want to keep the list to the ones you add. Go back and open Activities. Switch on Use activities, so each line of a timesheet can have an activity as well as a project. Close the rules.

    To add a project, click Add project and type its name. The project ID is optional. Use it for job numbers or cost codes. Type the address in Location, so your team knows where to go.

    Click Add a description for anything else they should know, then click Create project. Projects can also sit inside other projects. Click Add project again for the Hughes wedding. Under Parent, choose Weddings and Events, and click Create project.

    If you use Pay, a project can change what people earn. Open Weddings and Events, and find Project pay. A flat fee pays a set amount each time, whatever the hours. An hourly rate pays for each hour.

    Events pay two pounds an hour more, so pick Hourly rate and type two. You can add it to their normal pay, or pay this rate instead of it. Leave On top of base rate picked, and click Save changes. With GPS clock-in switched on, a project can have its own place to clock in.

    If you're not sure how to set up GPS clock-in, watch our video on it first. Open Riverside Café, and switch on Require clocking in here. It uses the café's work location, so your team must be within a hundred metres to clock in on this project. Projects inside it use the same place.

    Click Save changes. Now open the Activities tab. Click Add activity, and type Event setup. Setting up for events pays a little more, so click Hourly uplift and type one fifty.

    That's paid on top for each hour of setup. Then click Create activity. Any activity can go with any project. When your team records their time, they pick a project and an activity for each part of the day.

    Tom has sent his week, so click his name, then Monday. He did five hours as a barista at Riverside Café, an hour cleaning down, and two hours serving at Market Hall Kitchen. Pay, reports and exports split his hours the same way. When you build the rota, each shift can say which project it's for.

    In Time rules, open Locked hours, and find Projects on their rota shift. This decides what happens if someone clocks in to a different project. You can let them, with nothing marked. You can let them, but mark that line Not on rota on their timesheet, so you can check it.

    Or you can stop them, so they can only clock in to the projects on their shift. A shift with no project leaves them free to pick. That's it. Switch projects and activities on in Time rules, add your projects with their pay and location, and add the activities your team can use with any project.

  5. How to set up GPS clock-in

    2:17 · for managers

    Require people to be on site, add a work location and its circle, block or flag a clock-in from outside it, and check it in Clocking history.

    Read the transcript: How to set up GPS clock-in

    This is how to set up GPS, so your team can only clock in when they are at work. Tap the gear to open Settings. Choose Time Tracking from the list, then scroll down and open GPS location checks. Switch on Require people to be on site.

    Location checks also need strict clocking. That means hours only come from clocking in and out, and nobody can type them in by hand. Tap Continue. Next, set up the place where they work.

    Tap Add location, and type its name. Type the address and tap Search, then pick the right one from the list. The pin and the circle show where people can clock in. People need to be inside the circle.

    For a bigger site, drag the slider to make the circle wider. Here it's set to a hundred and fifty metres. Then choose what happens if someone is outside the circle. You can block them, so they can't clock in until they get there.

    Or you can let them clock in, and flag it so you can see they weren't on site. For this café, we'll block them. Scroll down, tick the projects that happen here, and tap Add location. Priya is on the way to work, and opens the app.

    Priya taps Select a project, then picks Riverside Café. The app checks where the phone is. It's still four hundred metres from the café, so Start Shift is greyed out. Tap the red line to see where Priya needs to be.

    At the café, Priya taps refresh. Now it says You're at Riverside Café, and Start Shift works. The app only checks the location when someone clocks in or out. It doesn't follow them during the shift, so it won't drain their battery.

    Later, you can check this in Settings, under Clocking history. It shows problems first, so tap Everything. Priya's clock-in is there, marked On site. That's it.

    Switch on location checks, add a work location, and pick its projects. Your team can then only clock in on site.

  6. How to set up overtime and TOIL

    6:00 · for managers

    When overtime starts and what it pays, weekend rules, higher levels, TOIL with a limit and an expiry, working a bank holiday, and one person's own rules.

    Read the transcript: How to set up overtime and TOIL

    This is how to set up overtime and time off in lieu, or TOIL. Overtime is the time someone works past their normal hours. With TOIL, those hours go into a balance they can take as time off. Open Settings, and click Overtime and TOIL.

    The page has three parts: Overtime, Time off in lieu, and Working a bank holiday. Open Overtime. Switch on Overtime tracking. Until you do, hours are still recorded, but none of them count as overtime.

    You're then asked whether to update timesheets already sent in. Recalculate works out the ticked ones again with the new rules. Exported ones are left alone, as they've already gone to payroll. You haven't set your rules yet, so click Not now.

    Your current setup sums up the rules in plain words, with an example. It changes as you change the settings below. There are three ways to measure it. Hours threshold counts overtime after a set number of hours.

    Working pattern uses each person's own hours for that day, so someone with a short Friday starts overtime sooner on a Friday. Time of day counts the hours worked at certain times. Click Time of day to see it. You can count the hours outside your normal times, like before seven or after five.

    Or count the hours within them, for something like a night shift. In this example, overtime starts after eight hours a day, so we'll click Hours threshold and type eight. Then choose what the hours are counted over. Per day suits fixed shifts.

    Per week lets a long Monday and a short Tuesday even out. Per month counts the whole month. We'll leave it on day. A day can also have its own rule.

    Click Configure days of the week. Every day uses the default until you change it. Here, weekends get their own rule. Click Add configuration, and call it Weekends.

    Overtime starts after four hours, and it's paid at double time. Then click Add configuration. Choose Weekends for Saturday and for Sunday, and click Save changes. You only need to recalculate once, after your last change, so click Not now.

    Under How it's paid, Multiplier pays a multiple of each person's hourly rate, like time and a half. Fixed rate pays each person a set amount an hour, which you type on their own Overtime tab. We'll keep Multiplier. Levels are the rates.

    Level one is time and a half, from the first hour of overtime. To pay more once someone has done a lot of overtime, click Add level. In this example, it's double time after two hours of overtime. Include overtime in payroll exports sends the overtime hours and pay to your CSV, Xero and QuickBooks exports.

    Most businesses leave it on. Click Save, then Continue. Once your rules are finished, click Recalculate here, so the timesheets already sent in follow them. In this demo, we'll click Not now.

    Now open Time off in lieu, and switch on Use TOIL. Overtime is then added to each person's TOIL balance when their timesheet is approved. TOIL can be earned in two ways. From overtime banks the overtime hours, and a short week takes nothing off.

    Flexi works against each person's working pattern. Hours over it bank TOIL, and hours under it take TOIL off, hour for hour. With Flexi, Lowest TOIL balance is how far below zero someone can go before you're warned. Our team only banks overtime, so we'll go back to From overtime.

    TOIL per hour of overtime is what each hour is worth. One times banks an hour. One and a half times banks an hour and a half. We'll pick one point five.

    Most TOIL someone can hold puts a cap on the balance. Anything over it is paid as normal overtime. Here we'll type thirty seven point five, a full week. Then choose when TOIL expires.

    Never keeps it until it's used. End of leave year clears it when the leave year resets. After set months clears each hour a number of months after it's earned. We'll use After set months, and type six.

    Then click Save. Working a bank holiday sets what people get for working one. Nothing extra treats it as a normal day. Time back banks the hours as TOIL, at one, one and a half or two times.

    Paid adds an overtime rate to those hours. For this example, we'll pick time back at one and a half. Anyone can have their own rules. Open Team, click Tom, then Overtime and TOIL.

    Overtime applies is on. Switch it off for someone who never gets overtime. Tom's normal day is nine hours, so we'll type nine. He'd rather be paid than bank TOIL, so we'll choose paid as overtime.

    He gets the company rate unless you change it here. Click Save Changes, and Not now. If you don't use time tracking, overtime can come from the rota. The page then starts with Overtime from rota shifts.

    Switch it on, and each published shift is counted the night after it ends, under the same rules. That's it. Switch on overtime and set when it starts and what it pays. Switch on TOIL to bank it as time off.

    And give anyone their own rules on their Overtime tab.

  7. How to set pay rates and export to payroll

    4:21 · for managers

    Give everyone an hourly rate, see what's due on the Pay page, and export approved hours and leave as a spreadsheet laid out the way your payroll wants it.

    Read the transcript: How to set pay rates and export to payroll

    This is how to set your team's pay rates, and export their hours to payroll. TimeTally works out each person's pay from their approved hours, and puts it in a file for your payroll software. First, pay needs to be switched on. Open Settings, and click Features.

    Switch on Export to Payroll, click Save, and then Save Changes. A Pay page now shows in the menu at the top. Now open Team. Click the Annual leave menu at the top, and choose Pay rates.

    Each person's hourly rate is listed here. No rate set means they don't have one yet. Click Edit next to Priya. Type her hourly rate, twelve seventy-one, and click Save Changes.

    The rate is saved, and you're asked whether to recalculate timesheets. That reworks overtime on timesheets already sent in. Pay always uses the current rate, so a new rate doesn't need it. Click Not now.

    Tom is on thirteen fifty, so click Edit next to Tom, type it in, and save it the same way. Leave Aisha and Sam for now, and you'll see what happens when someone has no rate. Next, open Pay. Total Due is what you owe for approved hours that haven't gone to payroll yet.

    The Due tab lists them, with a row for each person. The Exported tab keeps a record of everything you've already sent. Click Export. Choose what to include: hours and leave together, only hours, or only leave.

    Then choose where it's going. Xero and QuickBooks need connecting first, in Settings. CSV, or Excel, gives you a spreadsheet that any payroll software can import. That's the one we'll use.

    Under Which dates, you can export whole months, or your own dates with Custom. This team is paid weekly, so click Weeks, and tick last week. Under Who, everyone is ticked to start with. Mia is the manager and isn't paid by the hour, so untick her.

    Then click Next: review and customise. Aisha and Sam have no rate yet, so you're asked for one here. If you export without their pay, their hours still go in the file, and their pay stays due. Instead, type fourteen pounds for Aisha, and twelve seventy-one for Sam.

    Click Save rates and continue. The rates are saved for next time too. Nothing has downloaded yet, so you can check it first. At the top are the period, the hours and the total pay, with a line for each person below.

    Right now, the file has a row for every day worked, split by project. To change that, click Customise the file. Start from has three ready-made layouts: Payroll, Project billing, and Timesheet audit. Under Rows, you choose what one row of the file means.

    One row per day worked lists every shift. Most payroll software wants one total for each person, so click One row per employee. The columns are below. Click one to add it or take it out.

    Add Hourly Rate, so whoever runs payroll can check it. Take out Project Pay, as this team isn't paid by project. The preview shows the file as it will look. Click Apply.

    Click Download CSV. The file goes to your downloads, and these hours are marked as exported. Nothing is due on the Pay page now. The Exported tab keeps a record of them, so you won't pay them twice by mistake.

    To change a lot of rates at once, click Pay rules on the Pay page. Payroll integrations is where you connect Xero or QuickBooks. Click Pay rates. Everyone is in one list, and anyone without a rate is at the top.

    That's it. Switch on Export to Payroll, and give everyone an hourly rate on the Team page. Then export their approved hours from the Pay page.

For employees

Everything your team does, in under two minutes each

Send these with their invite and nobody needs showing twice. Each video has its own link to share.

  • How to record your time

    Clock in on the Time tab, pick a project and an activity, take a break, clock out, add a day you forgot and send your week for approval.

    Read the transcript: How to record your time

    Here's how to record your hours in TimeTally. It only takes a minute. When you get to work, open the app. You'll start on the Time tab.

    If your work uses projects, tap Select a project, and choose the one you're on today. If it asks for an activity as well, pick what you'll be doing. Then tap Start Shift. And that's you clocked in.

    You can close the app, and it'll keep counting. Off for lunch? Tap Start Break. When you're back, tap End Break, and the app keeps track of it for you.

    At the end of the day, tap End Shift, and you'll see a summary of your day. Worked on more than one project? Tap Add another project, pick it, then type in how long you spent on each. You can leave a note for your manager here too.

    And if it all looks right, tap Clock out. Your hours go straight onto your timesheet. Forgot to clock in one day? It happens.

    Under This Week, tap the day you missed. Put in your start and finish times, and your break, then tap Save entry. When your week's done, tap Submit Week, check it over, and tap Submit Timesheet. It'll show as Pending until your manager approves it.

    You'll find it further down too, under My Submissions, along with every week you've sent. And that's it. Clock in, clock out, and send your week off when it's done.

  • How to submit your timesheet

    Fill in a weekly timesheet: Fill default timesheet, Copy above, change a finish time, add weekly notes, save a draft and submit it for approval.

    Read the transcript: How to submit your timesheet

    This is how to fill in your timesheet, and send it to your manager. Open the app. On the Time tab, tap Submit Timesheet Form. Pick the week you want.

    This week is at the top. If your manager has set your normal hours, you'll see Fill default timesheet. Tap it, and Monday to Friday fill in for you. If you don't see it, type in your start and end times for each day, and choose your break.

    If you work on projects, tap Select a project under Monday, and choose the one you were on. Tuesday was the same, so tap Copy above. Then do the same for Wednesday to Friday. Thursday ran late, so tap the end time and type the new one.

    The hours change to match. If there's anything your manager should know, tap Weekly Notes and write it there. Not finished? Tap Save Draft, and come back to it later.

    To carry on, tap Submit Timesheet Form again, and pick the same week. Everything you saved is still there. Scroll down, check it over, and tap Submit for Approval. You'll go back to the Time tab, where your week shows as Pending until your manager approves it.

    That's it. Fill in your week, add your projects, and send it for approval.

  • How to book time off

    Tap the days you want off, choose a half day and the type of leave, add a reason, send it, and cancel it if your plans change.

    Read the transcript: How to book time off

    This is how to book time off, and send the request to your manager. Open the app, and tap Leave at the bottom of the screen. On the calendar, tap each day you want off. Days you don't work are greyed out.

    If you can book half days, you'll see a sun and a moon next to each day. Friday is a morning only, so tap the sun. Next, choose the type of leave. This is a holiday, so tap Annual.

    To add a note for your manager, tap Add Reason and write it in. Then tap Submit Request. A message pops up to say it has been sent. Scroll down, and you'll see the days have come off your leave allowance.

    Twenty-five is now twenty and a half. Your request is under My Submissions. Tap it, and you'll see Pending approval until your manager says yes. If your plans change before then, tap Cancel Request, and the days go back on your allowance.

    That's it. Pick your days, choose the type of leave, and send your request.

  • How to view your rota

    See this week's shifts and the weeks ahead, check who else is on, and ask a colleague to swap a shift.

    Read the transcript: How to view your rota

    This is how to check your rota, and see who you're working with. Open the app. If you're working today, your next shift is at the top of the Time page. To see your whole week, tap Rota at the bottom of the screen.

    Your shifts for this week are listed by day, with the total hours at the top. Each shift shows your start and finish times, your break, and where you're working. If your manager has left a note, it's under the shift. Tap the arrow on the right to see next week.

    One more tap shows the week after. If it says the rota isn't published yet, your manager is still working on it. Tap Today to go back to this week. Wednesday is today.

    Tap Who's on to see who else is working. If you can't make a shift, tap Request swap. Choose who to swap with, then pick one of their shifts to offer in return. Write a note to say why, and tap Send Request.

    Your colleague says yes first, and then your manager approves the swap. That's it. Tap Rota, check your shifts, and see who's on with you.

See how each part works before you set it up

The app plays one of these before the questions that set up time tracking, time off and the rota, and the first time you open Pay. Watch them here to decide what you need.

  • See how time tracking works

    Clocking in or a weekly timesheet, then approving the hours with overtime and pay worked out, and exporting them.

    Read the transcript: See how time tracking works

    Track your team's hours the way that suits each person, then approve them and export them in minutes. Your team can clock in and out on their phone. They pick the job and what they're doing, and if you switch on GPS, it checks they're on site first. When they stop for lunch, they tap Start break, and the break comes off their hours.

    At the end of the day, they clock out, and the hours go straight onto their timesheet. If you want, you can stop staff from editing their own hours. Tom fills in a weekly timesheet instead. You decide who clocks in and who fills in a timesheet, and how long each timesheet covers, from a week to a month.

    You check each timesheet, with overtime worked out from your own rules: paid at a higher rate, or banked as time off in lieu. Pay is worked out too, including extra for activities like driving. Then approve it in one click. Then export the hours to Xero, QuickBooks, or a spreadsheet.

    Pick a ready-made layout, or choose exactly which columns go in, so the file fits how your payroll works. Let's get your time tracking set up.

  • See how time off works

    Booking leave on a phone, approving it in one click, and allowances worked out for part-timers and new starters.

    Read the transcript: See how time off works

    Holiday, sickness and every other kind of leave, booked, approved and counted in one place. Your team can see how much leave they have left, right on their phone. They tap the days they want off. Leave can be booked in whole days, half days or hours, whichever suits you.

    Then they choose the type of leave, and send the request. The days come straight off their allowance. Twenty-five is now twenty and a half. Before they book, they can check who else is off, in their department or across the company, depending on how you set it up.

    You see the request on your Time Off page, and approve it in one click. Everyone's time off is on the calendar below. You can add your own types of leave, from sickness to training or time off in lieu, each counted in days or hours. You also choose when the leave year starts, how leave builds up, and how much carries over.

    Allowances are worked out for you, pro-rata for part-timers and new starters, with bank holidays booked in. Let's get your leave set up.

  • See how the rota works

    Building a week, templates, copy and paste, open shifts, alerts, publishing, and swaps your team asks for.

    Read the transcript: See how the rota works

    Plan your rota in minutes, and share it with your team in one click. You can keep a rota for each site or team, with everyone's week on one screen. Hours and wage costs add up along the bottom as you go. To add a shift, click on someone's day.

    Put in the start and finish times, choose their role, and save. You can also split a shift in two, or run it past midnight. Shifts you use a lot can be saved as day templates, and dragged onto anyone's day. You can save a whole week as a template too, and repeat it on other weeks.

    Monday looks right, so pick its shifts and copy them. Then click each day to paste them across the week. Holidays show on the rota too, so you can see who's off before you plan. If a shift needs covering, post it as an open shift.

    Your team can say they'll take it, and you choose who gets it. Alerts warn you when a day is short of staff, or a week goes over its hours or budget. The month view and the planner show the weeks ahead at a glance. When it's ready, click Publish Shifts.

    You can email just the people whose shifts are new or have changed. Your team sees their shifts on their phone, and who they're working with. They can ask to swap a shift, or take an open one. Nothing changes until you say yes.

    Let's get your rota set up.

  • See how pay works

    What's due, how each person's pay was worked out, and exporting it to QuickBooks, Xero or a spreadsheet.

    Read the transcript: See how pay works

    Here's how pay works in TimeTally. Once hours are approved, their pay is ready. You see what's due, split into regular hours, overtime and holiday pay, with a line for each person. Click anyone to see how their pay was worked out.

    Their hourly rate, their normal hours, and their overtime, here at time and a half. Everyone can have their own rate. Overtime, bank holidays and paid breaks follow your rules, and a job or an activity can pay extra on top. When it's time to pay, export it.

    Send it straight to QuickBooks or Xero, or download a spreadsheet, for the week you want. Check the totals, then set the file out the way your payroll needs it. Start from a ready-made layout, and add the columns you want. Download it, and everything in it is marked as exported.

    So you can always see what's been paid, and what's still to pay. Set your team's pay rates, and the rest is worked out for you.

The same videos, inside TimeTally

Managers find every film in the app under Settings, then Tutorials, for employees and for managers. It shows only the parts your account uses, so nobody wades through a rota video if you don't run a rota.

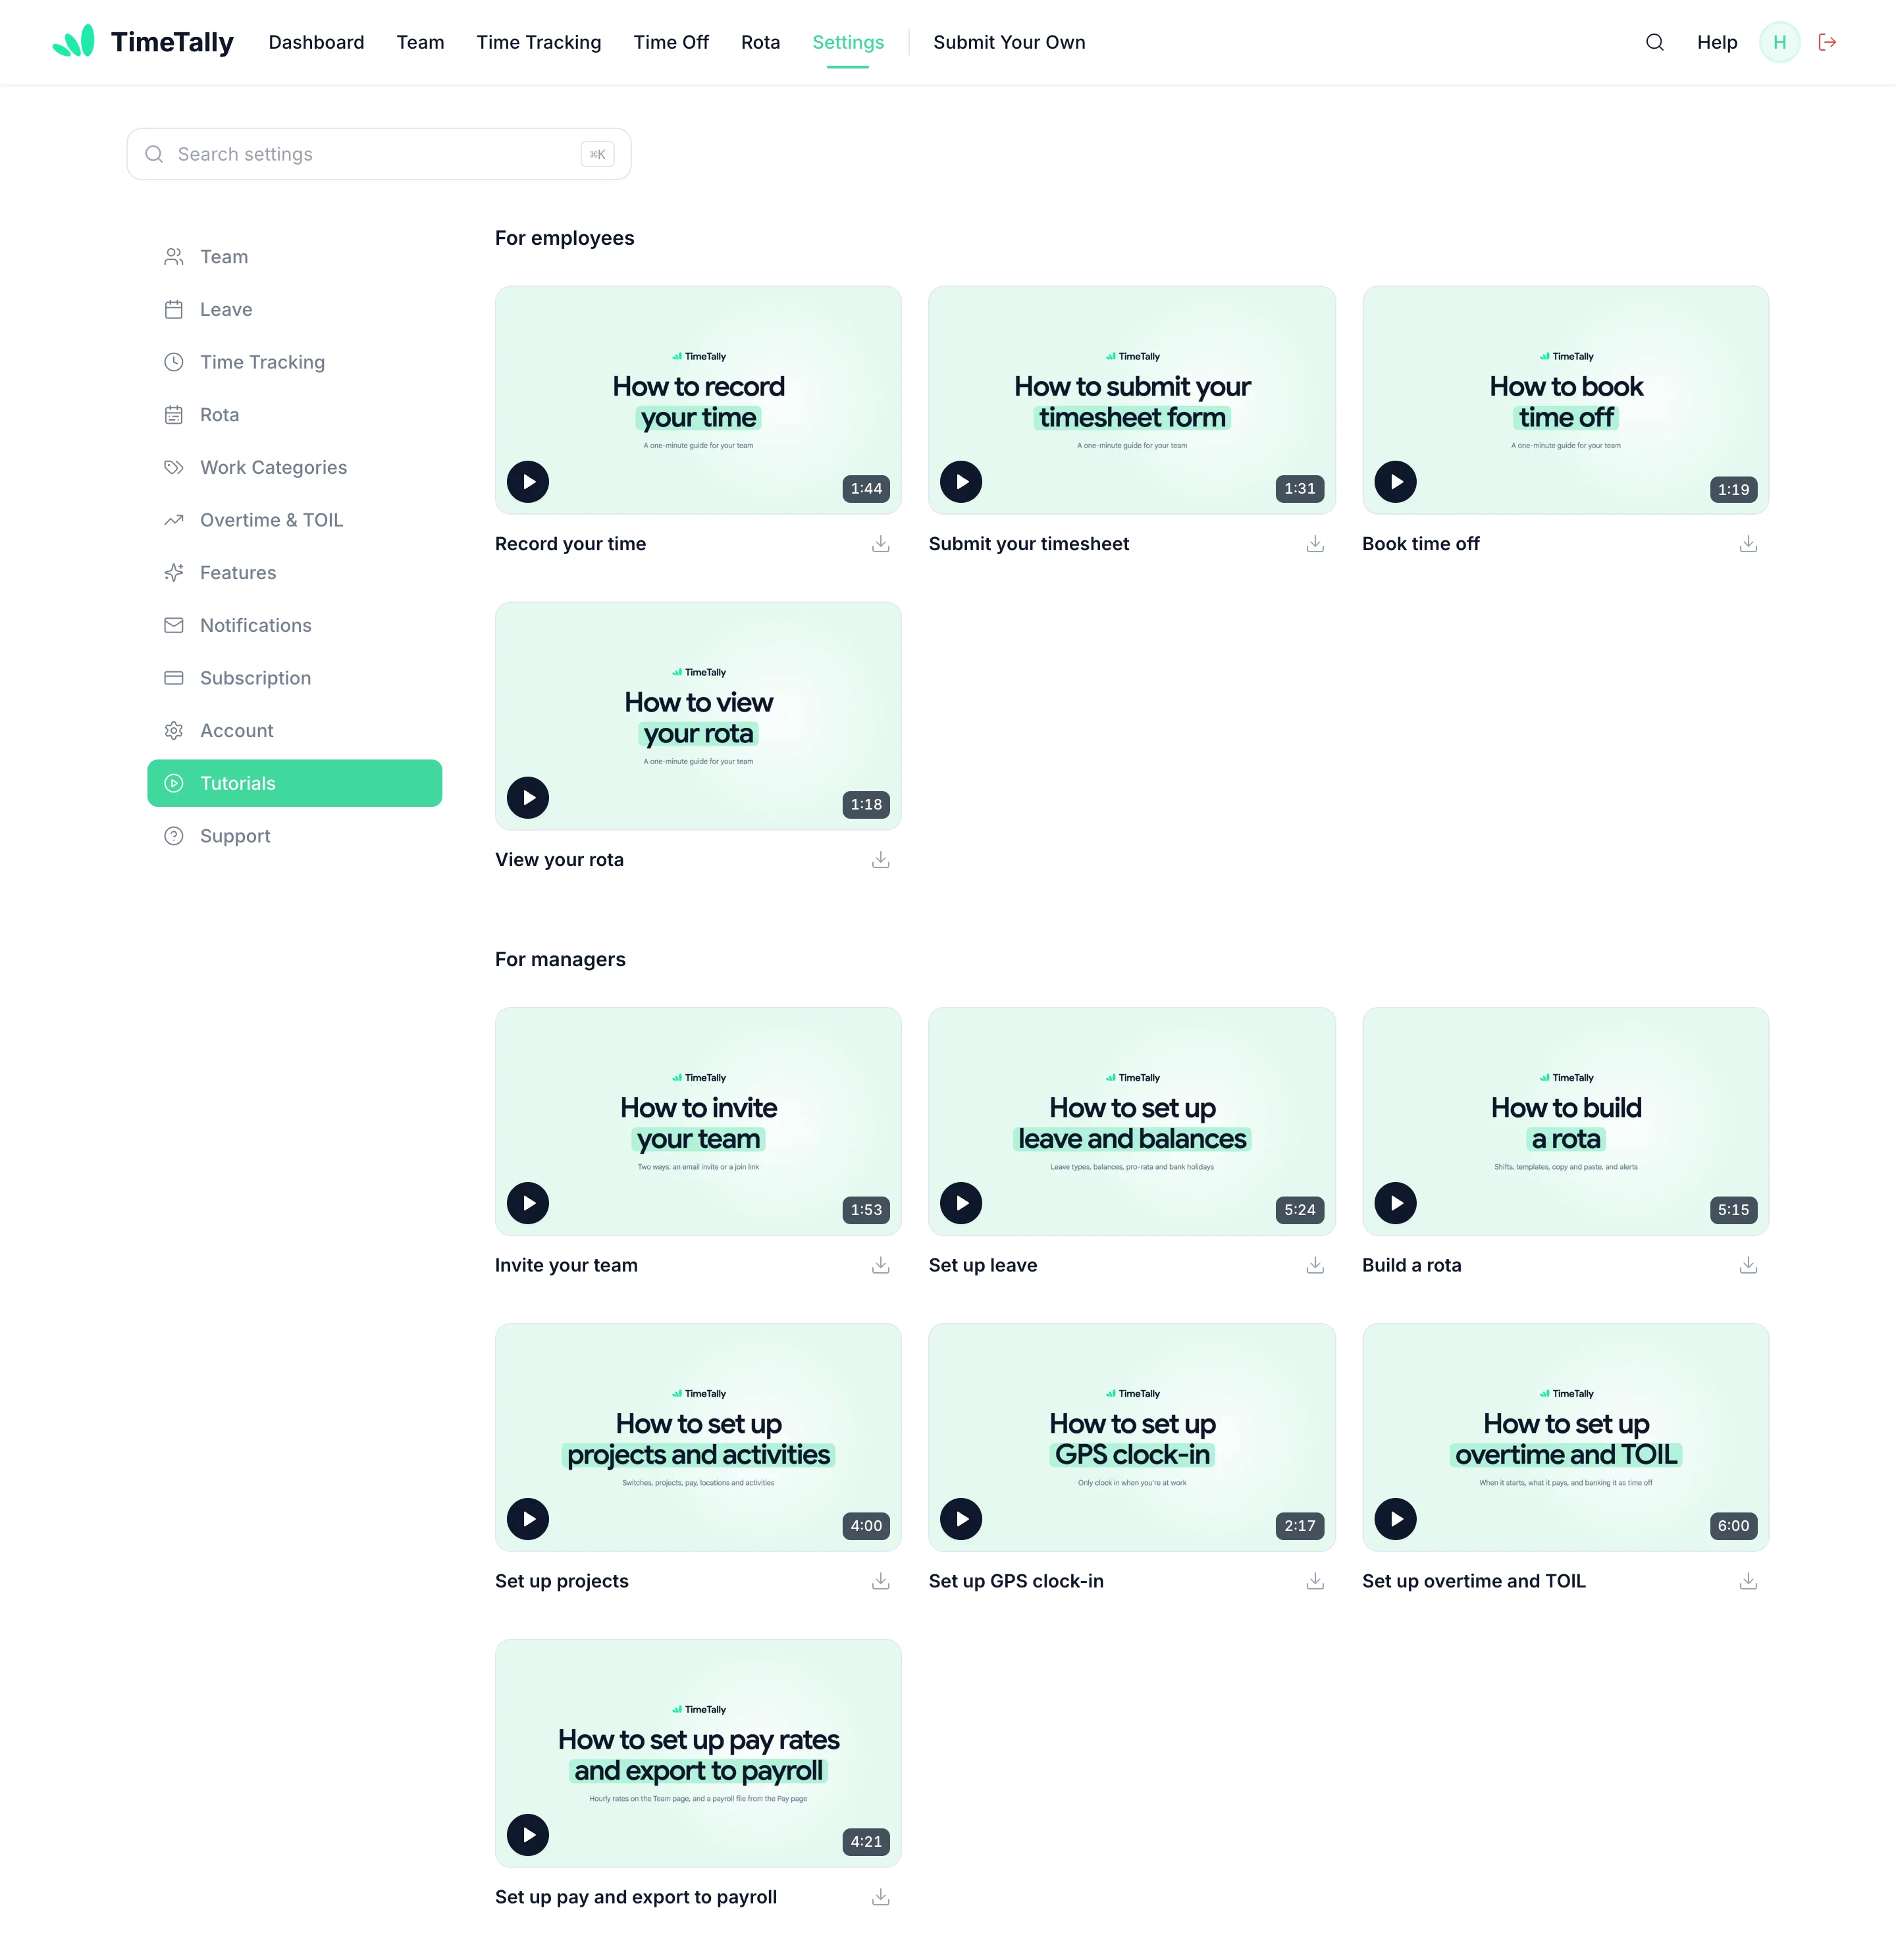
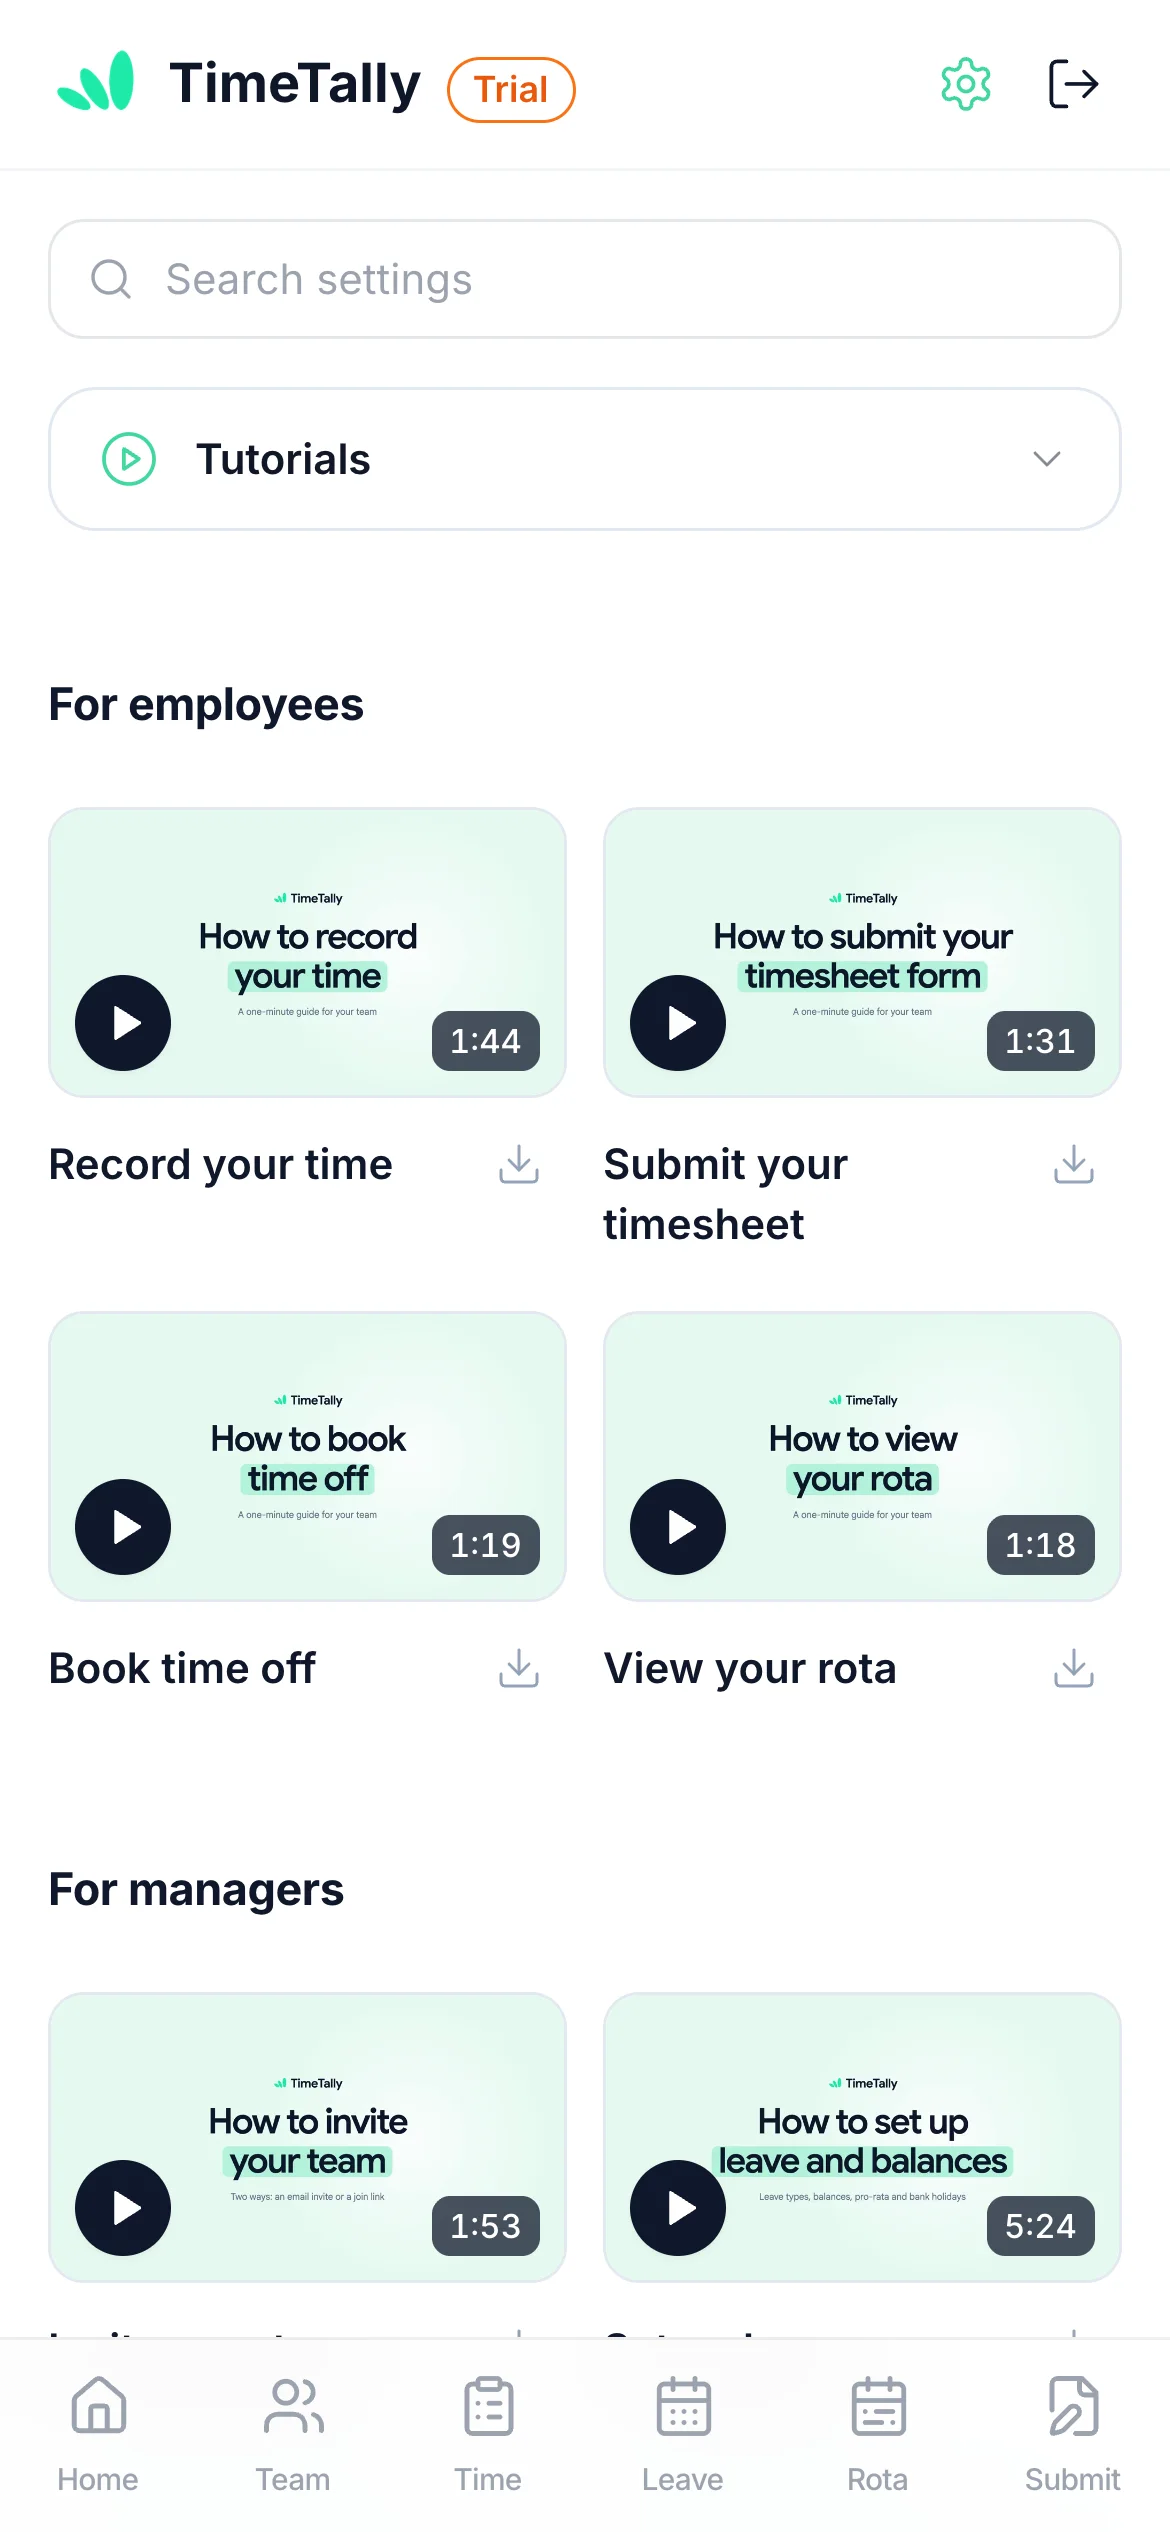
Settings, Tutorials in TimeTally: For employees, Record your time 1:44, Submit your timesheet 1:31, Book time off 1:19 and View your rota 1:18; For managers, Invite your team, Set up leave, Build a rota, Set up projects, Set up GPS clock-in, Set up overtime and TOIL and Set up pay and export to payroll, each with a download buttonSettings, Tutorials on a phone: the employee videos, Record your time, Submit your timesheet, Book time off and View your rota, then the manager videos

Rather not set it up yourself?

Videos are one part of it. Send us your staff list, leave balances and rota, and we'll build your account for you, with no setup fee. Inside the app, managers can ask the TimeTally assistant and get an answer straight away. And a person replies to every message within 24 hours, Monday to Friday.

Questions about the tutorials

Sharing the videos, captions, and where they are in the app.

Book a Demo

Still have a question? See all FAQs

Are the TimeTally tutorials free to watch?

Yes. Every video on this page is free to watch and download, with no account. They're films of the real TimeTally app, made by the TimeTally team, with captions on every one.

Can I send these videos to my staff?

Yes. Each video has its own link: add its name to the end of this page's address, such as timetally.uk/tutorials#book-time-off or timetally.uk/tutorials#record-time, and send it in your group chat or with their invite. You can also download a video and share the file.

Where are the tutorials in the TimeTally app?

Managers find them in Settings, under Tutorials, split into For employees and For managers. The app only lists the ones for the parts of TimeTally you have switched on, so a team that doesn't use the rota won't see the rota videos.

Do the videos have captions?

Yes. Every video has English captions you can switch on from the player, and the full words of each one are under it on this page, so you can read it instead of watching.

What if a video doesn't answer my question?

Managers can ask the TimeTally assistant inside the app, which answers straight away, or send a message to the team: a person replies within 24 hours, Monday to Friday. Bigger teams can also have their account set up for them, or book a 30-minute demo.

Watch it, then try it with your own team

Start a 14-day free trial and follow along: invite your team, set up leave, build next week's rota.

14-day free trial · No card needed · £3 per employee a month